How to replace the serpentine belt on a 1995 Olds 98 with 3.8 liter, 3800 series 2 engine. This might apply to other makes and models.
Warning - Remove the negative battery cable before beginning work. This will prevent accidental engine engagement or other accidents related to having voltage available in the car chassis.
I have tried diligently to make this information accurate and complete. However, I was human the last time I checked and I may have left out a step or two. Do not completely rely on my information to complete this task. If you are comfortable working on cars, engines and the like, you'll probably do fine. Use this document as a point of reference.
Please be sure to exercise caution when working with tools and on mechanical devices. Remove loose clothing and wear a short sleeved shirt. Remove jewelry, watches and the like. If you have long hair, tie it back. DO NOT place any part of your body near moving machinery. Use the proper tool for the job. Accidents and damage to person or property can happen when you improvise.
Another method, perhaps less complicated, is offered at http://ironlizard.blogspot.com/2006/11/missing-label.html
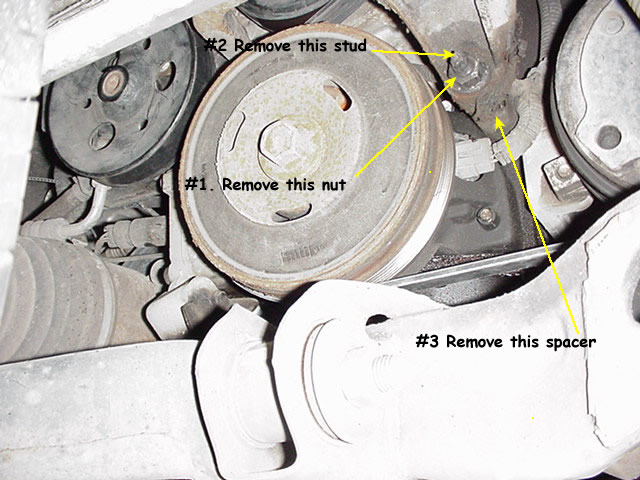
Also, Mark writes: Hello, I'm Mark. I used your instructions on changing a belt on a 3.8 v6. Just wanted you to know I found a super simple way to do it.. all u do is remove the nut stud and spacer off the bottom of the mount. Slide the belt through there and your good.
Much to my disappointment, GM engineers designed the serpentine belt to wrap around an engine mount. What would normally take 10 minutes for just about anyone, takes an hour or more for someone with mechanical apptitude and the right tools. I was shocked that there weren't any websites showing how to do this. I found one posting on Google that made this information possible, thanks Ian. No, I don't have a service manual...yet.
It is unlikely that the average car owner would tackle this job. My objective is to show you how to do this and give you a shopping list of tools that make it possible/easier.
I wrote this after the fact and hopefully I didn't
leave any steps out. Don't depend entirely on this document, use common sense
and try to recognize what's going on here. If I left something out, let me
know. ![]()
You'll need a new serpentine belt
An assortment of metric sockets and wrenches
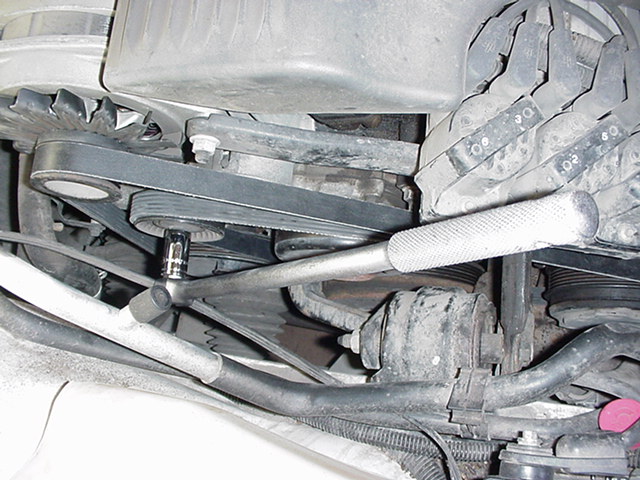
A long 3/4" breaker bar. This makes rotating the tensioner pulley easy.
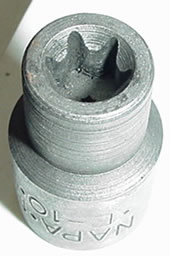
A 10 mm reverse torx socket
1. Get the old serpentine belt off the alternator using a 15mm socket and turning the idler/tensioner nut counter-clockwise. This will remove the tension from the belt so it can be lifted off the alternator pulley.
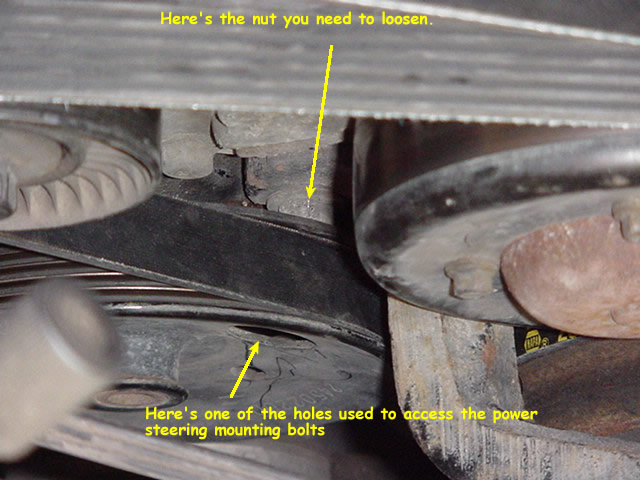
2. You'll need to remove the 2 bolts from the power steering (ps) pump to facilitate loosening the top two motor mount nuts. There are 3 large holes in the ps pump pulley that you can use to remove its bolts. If you encounter ANY resistance when removing the bolts, make sure your socket is not pressing on the pulley from the inside. If you continue removing the bolt in spite of this resistance, you will damage the pulley or pump. If you encounter resistance, rotate the pulley slightly to provide clearance. After completely loosening the two bolts, I left the bottom bolt in the pump housing and removed the top bolt completely.
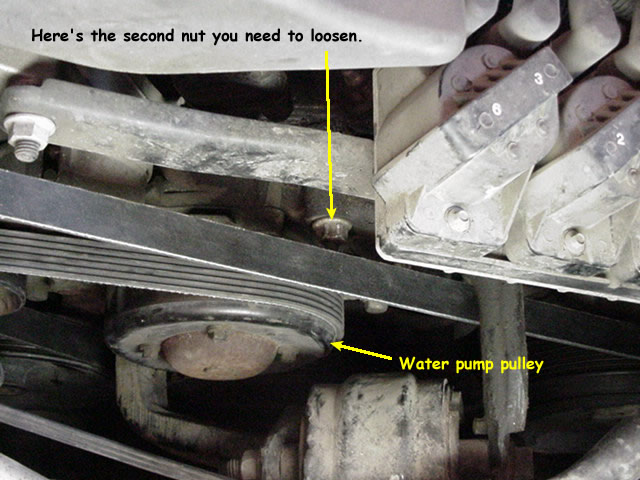
Pivot the pump out of the way so you can access the top left motor mount nut. Loosen it (15mm) slightly, but don't remove it. There is another identical nut just above and to the right of the water pump pulley; loosen it slightly too. You are loosening these nuts so that you can remove the spacer mentioned in step 4. Loosen them just enough to remove the spacer. DO NOT REMOVE THEM! As long as you don't remove these two nuts, the engine will remain supported. I don't remember needing to support the engine with a jack.
3. Remove the plastic shield beneath the area you're working on. There are 4 little plastic expanding fasteners that hold it on. I used a pair of wire cutters to grab the little plastic head (don't cut the head off) and pried the fastener out. You may find a better tool that works, it's up to you. After lifting the head out 1/2" or so, pull the whole thing out. Pull the shield out.
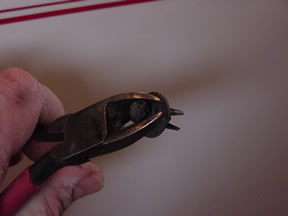
4. Here's a view of the bottom. Remove the nut, then remove the stud using the 10 mm reverse torx. Pull the spacer out.
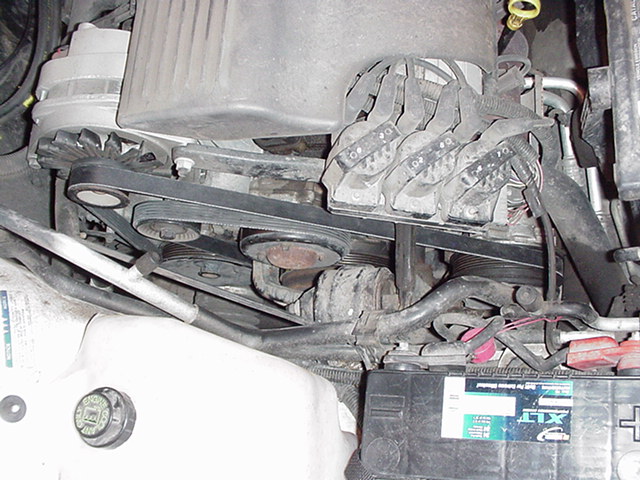
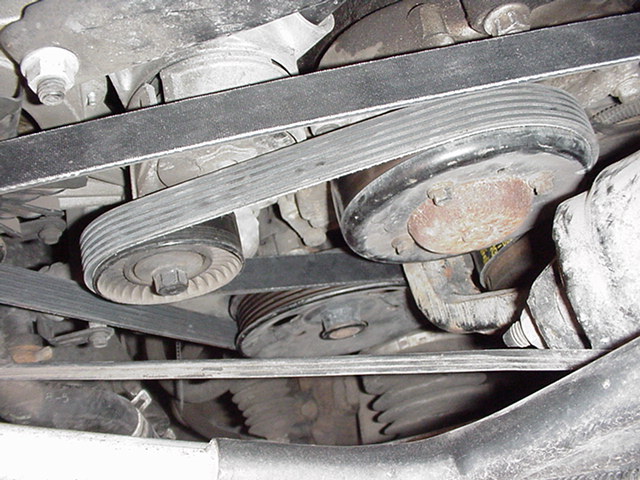
5. Remove the old belt, install the new one. Reference the pics below for proper routing. When you have the belt routed around the a/c and crank pulleys, it's time to fasten things back together. Put the spacer back in the mount, insert the stud and tighten. Put the nut back on. (I don't have torque values)
6. Tighten the top motor mount nuts. Bolt the power steering pump (ps) back on. This was a bit of a hassle. You can't see where the holes are, so it makes it really tough to line things up. Eventually I figured out that the top bolt needs to be pulled back so that the bolt wasn't sticking out beyond the pump body. Put into roughly the correct position, then start trying to screw it in. Once I did this, it was easier. If the bolt is sticking outside the pump body, it wasn't possible to move it into the correct position. Tighten the lower ps bolt. I don't have the torque values.
7. Route the belt around all the pulleys except for the alternator pulley. The most difficult place to verify proper belt tracking is on the crank pulley. Check it closely and make sure it's positioned properly. Rotate the tensioner pulley counter-clockwise and put the belt onto the alternator pulley. Double check your work. Is everything tight? Remove your tools from the work area and reconnect the battery cable. Start and run the engine for a second or two. Check everything again to make sure the belt is tracking in the pulleys properly.
8. Put the plastic shield back in.
9. You should be done now. Run the engine and make sure things are right.
Good luck.