1984 Honda V-65 Sabre Starter Motor Overhaul
For additional reference, check out the SABRE/MAGNA FAQ http://207.202.202.196/sabmag/sm-faq.htm#starter_rebuild If that link is bad, go to http://www.sabmag.org and find it from there.
Prepare for oil to drain out when the starter is removed. You’ll lose a cup or so in the process. Leave a pan under the bike, as oil will drip out for some time. If the starter will be out for a while, stuff a rag in the hole to keep the snakes out. ; ) The starter motor can be somewhat stubborn coming off. Just be patient, pry gently, and tap with a rubber mallet to break the seal between the o-ring the engine case. If you have the oil mod kit, you may want to disconnect the lines from the oil filter adapter. This will make removing the starter easier and if you're going to reuse it, lessen the chance of damaging the o-ring on the end of the starter. Oil will come out of these oil lines too. Reconnect them after removing the starter. Be sure to use a backup wrench when removing the fittings from the adapter.
Once the starter motor is off, spray the threads of the long Phillips head bolts with some sort of thread loosening petroleum distillate. I’d let it set overnight, but if you’re in a hurry, you might get lucky like I did. If there’s any corrosion at all, let it set. I ordered new bolts beforehand knowing I may need them. You’d probably have good luck putting vise-grips on the heads of the bolts since there is a fair amount of metal to grab onto. As a last resort, use a hammer impact driver; be careful not to break the ears off the end cap.
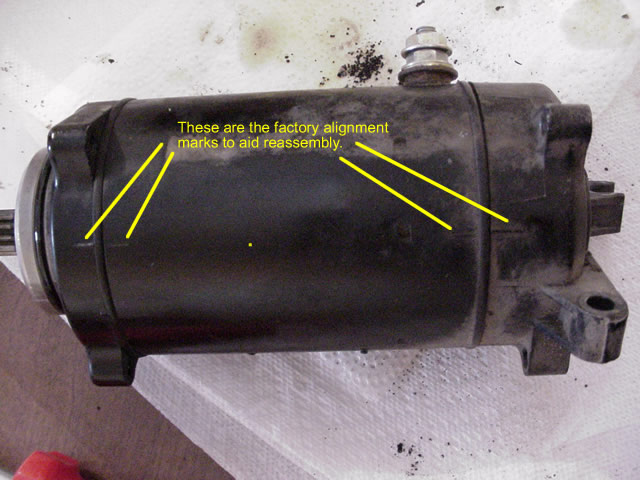
You will probably find raised marks on the housing to aid realignment
when putting things back together. If you can’t find them, make some
of your own. See fig. 1
figure 1
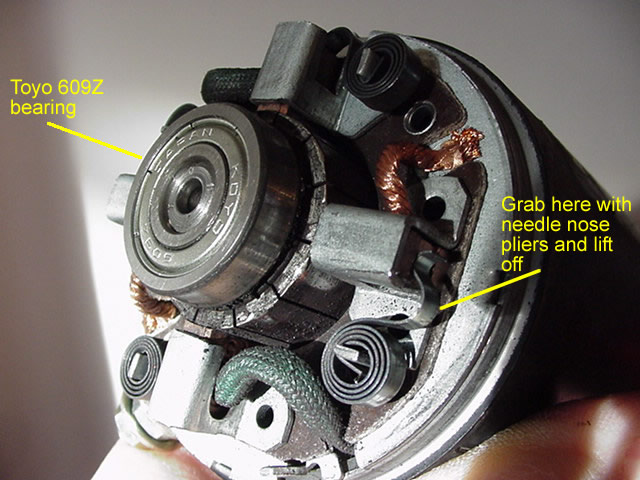
The end caps come off easily. Using a pair of needle nose pliers, remove the brush springs, noting how they come off. See fig. 2
figure 2
PPull the armature out of the housing. It will not slide out easily, the magnets in the housing want to keep it right where it is.
Check the ball bearing for roughness or other abnormality. Replace it if you have any doubts. The needle bearing in the end cap is lubricated with engine oil. It shouldn’t have any problems. If you notice any oil on the starter motor side of the oil seal, replace the seal.
If you want to install new brushes now is the time. My brushes were just fine. After over 50,000 miles, they had only worn 1/16”. The new brushes were ½ “long. Your mileage may vary YMMV. I took some 400-grit sandpaper to the commutator contacts to make them shiny again. I checked it for square ness, and it was within a couple of thousandths. There will be no need to put this on a lathe.
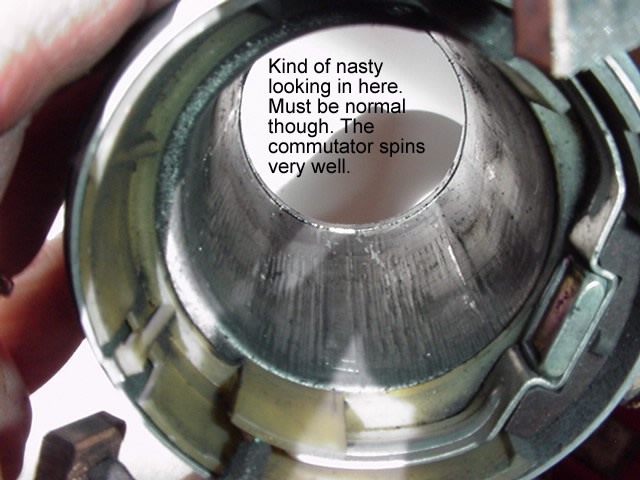
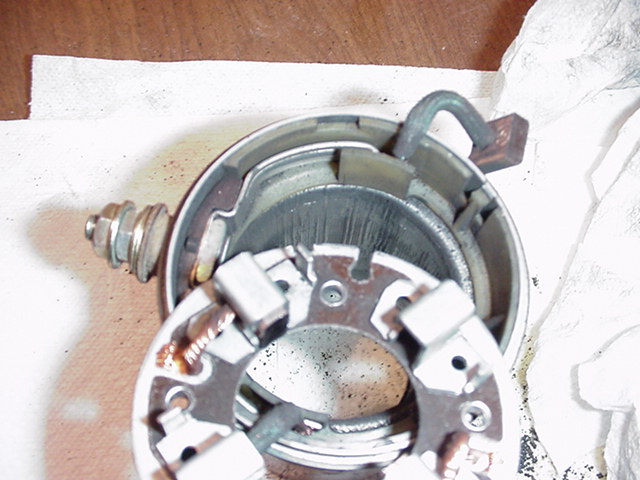
The bore of the armature was not smooth. In fact, it kind of weirded me out until I realized it was probably normal. See figure 3
figure 3
If you get compulsive and clean the armature, and end caps, I wouldn’t suggest putting them in solvent. The end cap that covers the brushes has insulation tape inside and solvent will surely remove it, or compromise its ability to stay put. If you accidentally remove it, it seems to be ½”medical tape. I had to replace mine and that’s what I think it was. It had the gooey adhesive like medical tape and it had the cotton reinforcement fibers in it. It didn’t seem to have any resistance to heat as it burned quite readily and there were no ceramic or fiberglass fibers in it. If you replace the tape, make sure the surface is perfectly clean and use clean fingers to apply the tape. See figure 4.
figure 4
Install the brush holder. It only goes on one way. Carefully insert the insulated wires into the corresponding slots on the plate. Match up the detent in the housing with the correct protrusion on the plate. If the brush plate doesn’t line up, turn it 180°. See figures 5 & 6.
figure 5
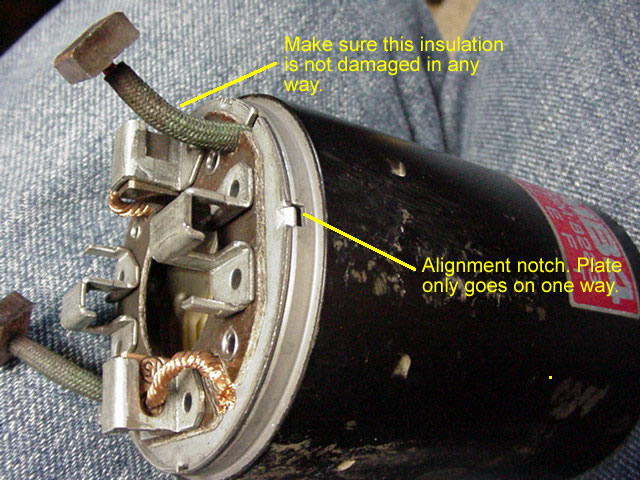
figure 6
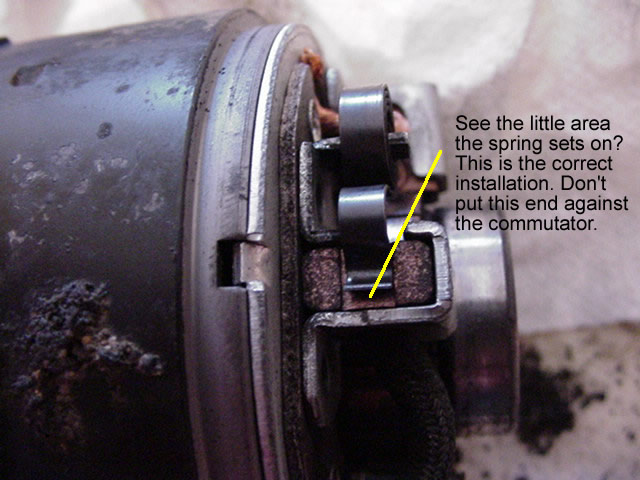
Insert the brushes into their holders. Make sure the correct side of the brush is facing the commutator. If you’re reusing the old brushes, it will be obvious, there will be a curve worn into the brush. New brushes will not be as obvious. Don’t put the brush springs on yet. See figure 7.
figure 7
Insert the armature into the housing, put the brush springs back onto their posts, and spring them back into position with some needle nose pliers.
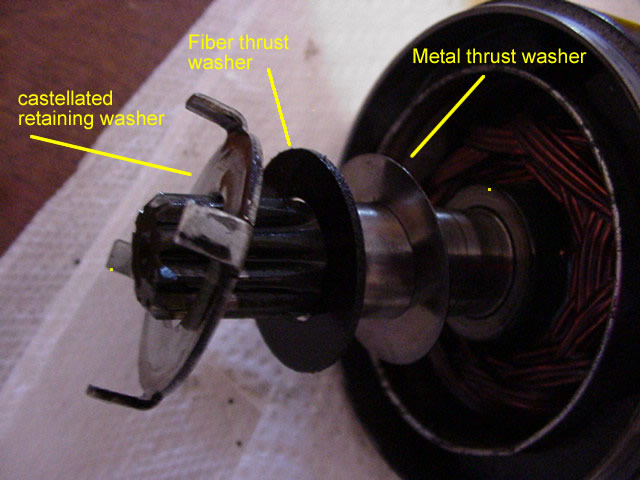
Install the end cap o-rings. If you’re installing new ones, there isn’t a correct way. If you’re installing the old ones, put the concave side toward the end caps. Install the end caps. Make sure you install the thrust washers and the castellated retaining washer as they were removed. See figure 8 & 9.
figure 8
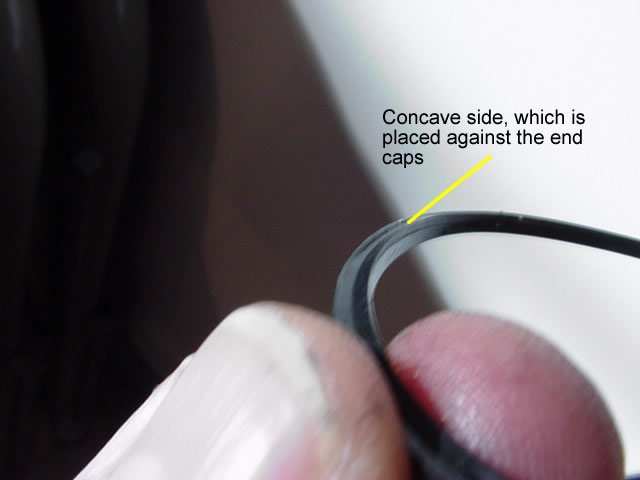
figure 9
Install the long Phillips head bolts and put a drop or two of Locktite Blue on the threads. Tighten them up. I wouldn’t reef on them very hard, just snug them well, and recheck each for tightness. I replaced the o-ring on the engine to starter interface.
Test the starter on the bench with jumper cables and your bike's battery. Attach the negative cable to the body of the starter and the positive cable to the hot input post. Don't be alarmed by a few sparks as you touch the post-just make sure nothing combustible (including the battery) is nearby The starter motor should rock and spin hard when 12 volts are directly applied to it.
At least one Sabmag list member had difficulty installing the starter without damaging the o-ring. I suggest making sure that you lube the o-ring and the engine case well with oil. You should then carefully install the starter making sure that you don't pinch or nick the o-ring in the process. I have the oil mod kit and elected to disconnect the lines from the filter adapter. This allowed me to wiggle the starter straight into the case and minimize the chance of damaging the o-ring.
You may not find a torque recommendation for the starter mounting
bolts. Since they are 6 mm, I did find a reference for tightening 6 mm bolts;
it was 6-9 foot pounds (or 72-108 inch pounds). I torqued mine to 95-inch
pounds. I might be sorry someday, but I chose to use anti-seize compound in
lieu of blue Locktite on the starter mounting bolts. I'm very nervous about
steel alloy bolts going into aluminum threads. I've had far too many bad experiences
with steel bolts shearing off in aluminum and I choose to risk loosing bolts
rather than not being able to remove them at some point in my aging future.
I CAN'T stand the stress of a bolt refusing to turn counter-clockwise when
applying reasonable force. When that 'snap' happens, I wonder if I'll see
threads or a threadless shank. I hate that feeling. I am not going to risk
a coronary over this. If I lose a bolt because I didn't use Locktite, so be
it. I'll consider the experience of dealing with that situation more of an
adventure than an inconvenience. Unless of course the starter falls off and
dangles by its power cable in a guardrail-less, tight left-hander on Independence
Pass, CO. Let's see, starter falls out, super slippery Mobil 1 oil drains
out in-line with a rear tire.